At first, your new website seems perfect. But after a while, you may have some small things you want to change or update. Even if you hired someone else to create your site, you can still easily edit with Elementor after the project has been completed.
Learn how to edit your website with Elementor with our simple and user-friendly guide, or find expert Elementor professionals to do it for you.
If you don’t already have Elementor or Elementor Pro, pick it up here and follow along with our tutorial.
What is Elementor?

Elementor is a WordPress plugin that allows web designers and developers to create their own custom website layouts with ease.
Elementor makes editing your website as easy and user-friendly as possible. All you have to do is log into your WordPress site, select the page or post, and click “Edit with Elementor”.
The rest is up to you.
This plugin is available for free on WordPress’s official website. It also provides support for responsive websites, which make it easier for mobile users to browse the site.
The Elementor plugin contains a drag-and-drop interface that enables users to easily customize their website in any way they want. It also includes more than 500 free digital assets and templates that are easy to edit and customize.
If you had your website built by Awebco, we most likely used Elementor to create it.
Doing this provides the website owner full control and access over the website, even without having to have any coding knowledge.
To learn how to edit with Elementor in WordPress, you first need to make sure you have Elementor on your WordPress site. If you don’t have it already (you should), you can get the Elementor plugin through the WordPress plugin area and activate it if it’s not already.

Once it is activated, you can begin using the Elementor visual editor and other features to customize your page content. You can define layouts, remove page elements, and use a variety of pre-made templates.
How to Customize Your Pages with Elementor
First, you’ll need to find out what page it is that you would like to make edits to.
Log into your WordPress account and go to the ‘Pages’ section on the left-hand side of the screen.
Then you will need to select the ‘Edit with Elementor’ button when you hover over the page you want to edit.
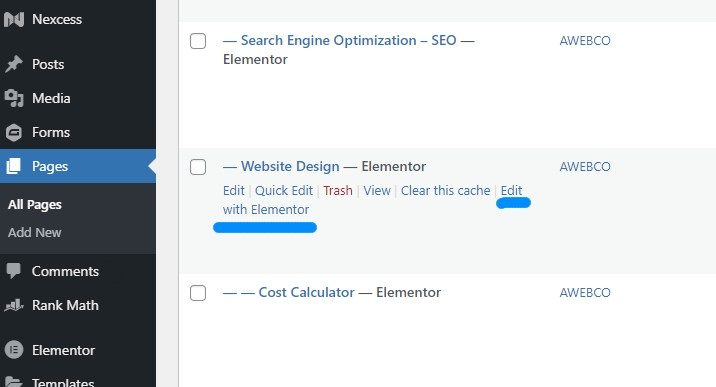
Alternatively, you can click on the ‘Edit’ button, go into the page, and then select the big blue ‘Edit with Elementor’ button.
Editing Sections, Columns, and Elements
Before you start using the editor, you’ll need to know the difference between a section, a column, and an element.
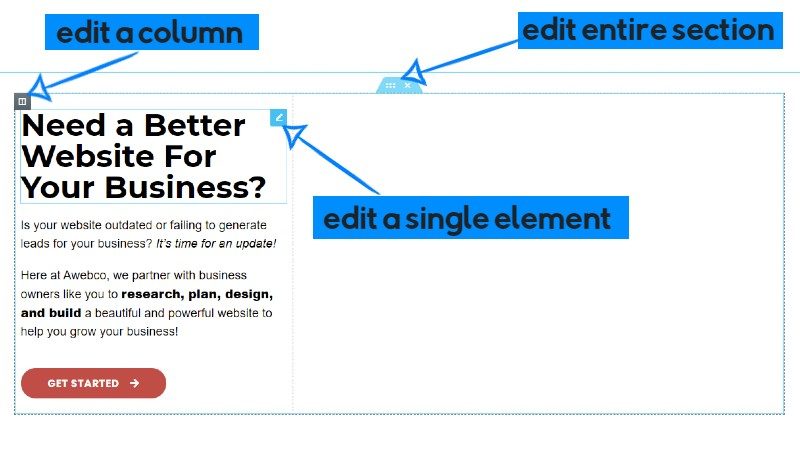
A section is like a container that holds your columns and elements. You create a new section by clicking the purple ‘+’ symbol at the bottom of the page. The section dictates how wide and how tall the overall container can be. This is also where you can add background images that will sit behind the elements you add. A section will be a complete block of content you want to create.
A column is a percentage of the width of the container. When you click the plus to create a new section, it will ask you to select your structure. This is how many columns and how wide each column width is set to. You’ll generally use between 1 and 4 columns, however you can have up to 6 columns in 1 section.
An element is a specific field of content you can drag and drop to build the actual website content. An element can be a text field, a heading, an image, a video, a website form, HTML blocks, dividers, animations, Facebook comments, Instagram feeds, menus, and so much more.
Using a combination of sections, columns, and elements, you can create a website that is entirely unique and functions exactly how you need it to.
Changing Font Size or Color
If you want to divert from your site’s standard typography, you can always make changes to the font size, color, and beyond.
Under the “Style” tab, you’ll simply want to look for the pencil icon to adjust these factors. You’ll be able to change everything from the font family and the font size to the weight, color, line spacing, letter spacing, and beyond.
Customize the Colors
To get started, we’ll look at how to use Elementor in WordPress to adjust the colors of your website elements, such as text color and background color.
Begin by going to Pages and finding the existing page you wish to edit. Once you find it, select the “Edit with Elementor” option, and click on the element you want to change the color of once the page loads.

You can also create a new section by going to the bottom of the page and choosing the + option.
Now, you can choose options like making a two-column layout. After you do this, you can drag and drop widgets into each column. You can now edit Elementor page content, like colors or fonts.
If you are trying to edit with Elementor, you can access colors through Elementor’s editor menu. In the menu, choose “Default Colors.” Now, you can look at the current color palette you are using on the site.
The next step in figuring out how to use Elementor for colors is to figure out the color you want. There are even more options available under “More Palettes.” After you customize Elementor colors, they will show up in real-time on the page.
Change Your Fonts & Typography in Elementor
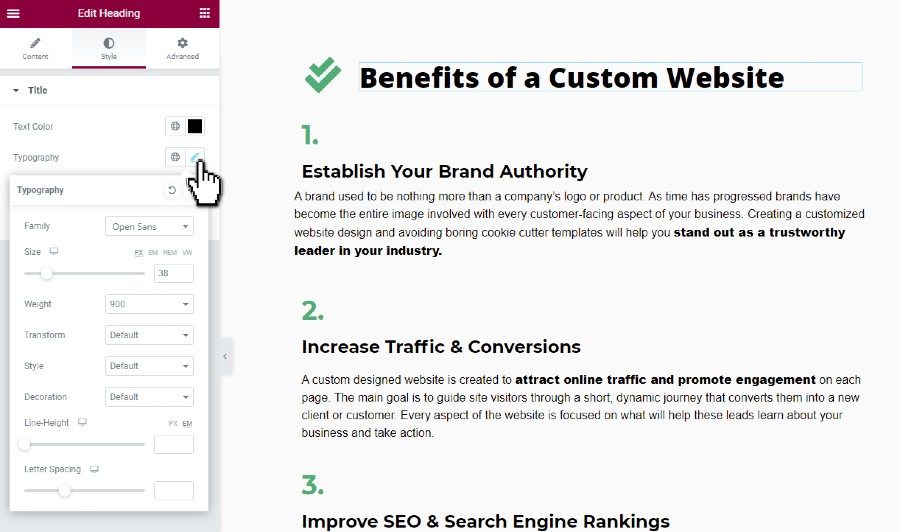
If you are trying to learn how to edit with Elementor in WordPress, you may also want to experiment with your fonts, font sizes, and decorations. Fortunately, editing your fonts is pretty simple.
To edit fonts globally, you should go to the menu and then select “Default Fonts.” Then, you can choose the typography you want for the body of your text, the headings, and your accent text.
Global changes will affect the font for your entire site. If you want to just change the font on a single article or heading, you need to go into the widget to override the settings.
Adjusting the Backgrounds
To adjust the background of a section, first click on the section container (the blue tab with white dots in the top middle of each section).

Along with editing Elementor page content, you can also change the background. To switch the image, you just need to go to the “Background Overlay” settings. Once there, you can adjust the location and opacity of the background image. You can also access advanced features, like CSS filters.
Instead of changing the background globally, you can also adjust it for just a single section. You just have to click on the section you want. Then, adjust it by going to the “Style” tab.
How to Make a New Section in Elementor
If you are still figuring out how to use Elementor in WordPress, you may need help adding sections. Fortunately, learning how to add a new section in Elementor is fairly easy. In Elementor, sections are known as blocks.
Adding New Sections
To add a new section in Elementor, simply scroll to the bottom of the page and click the big + symbol.

After you click the + to add a new section, it will prompt you to choose the column structure of the new section.
Creating New Columns
Depending on the type of section you’re trying to create, you can decide how many columns you will need and how they will be organized.

Whether you want to change a column or add a new one, you can adjust columns either by using the options menu in the Elementor panel or by simply right clicking the area you want to edit.
From this point, you can create a new column, duplicate a column, or even copy and paste a column to a different section of the page. Each column you make or edit will have options to change various aspects such as the layout, style, margins, padding, motion effects, and more.
Adding New Blocks
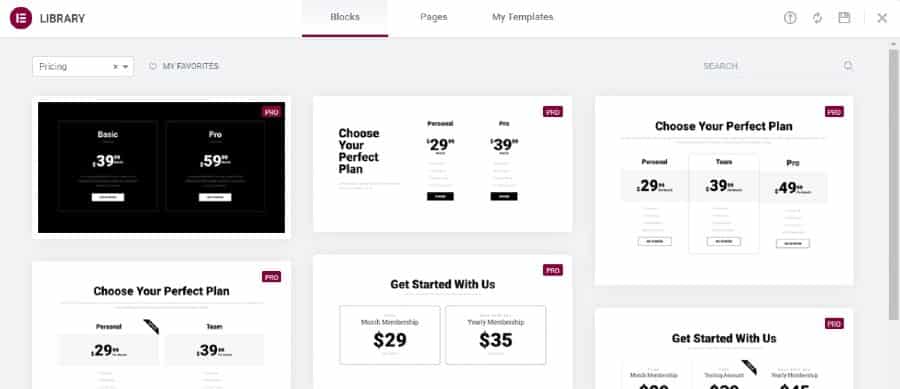
Blocks are essentially reusable chunks of content you can create or choose from the library. If you are on the home page, you can experiment by going to the Folder icon. Then, select “Blocks.”
From here, you can easily learn how to add a new section in Elementor by picking the blocks you want. Elementor has more than 235 different kinds of blocks, so there are plenty of different options you can choose from. These pre-designed templates are basically Lego bricks you can use to customize and build your site.
You can make your life easier by saving your blocks for the future. After you learn how to customize Elementor blocks and are done making changes, you should rick-click on the block and choose “Save as Template.” Now, you can find the same block in the “My Templates” section of the library.
Setting Margins and Padding

Another one of the things you can do when learning how to use Elementor is altering margins. For example, you can edit with Elementor and change your heading margin on the menu page. To do this, you have to start by selecting the heading.
After you select the heading, you should click on the “Edit” button. Next, choose the “Advanced” tab. Now, you can change the settings for the element.
The main reason to adjust the heading is if it overruns the edges of other content on your page. If this happens, you can shrink the margin for the heading to stop the font from overlapping.
Along with changing the margins, you’ll also need to know how to make adjustments to the padding in Elementor.
What’s the difference between margins and padding?
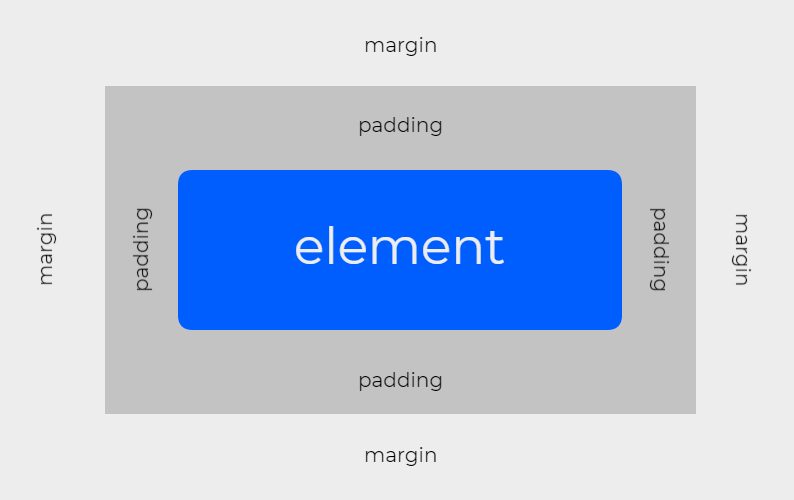
Margins are the amount of space on the outside border of whatever element you are working on.
Padding is the amount of space on the inside of the element you’re editing that determines how close the interior content is to the border.
To change the padding, you’ll want to edit the column under “Advanced” settings directly below where you change the “Margin”. You’ll be able to adjust the amount of space between the edge of the section’s border and the content it contains.
In some cases, you can also use negative padding, which means that the shape or words will overlap the border creating an offset effect.
How to Publish Pages Through Elementor
Once everything on your page is perfectly set up, you need to learn how to publish a page with Elementor. When you are certain your page is completely done, you can select the “Preview” icon on the bottom panel. Then, you can look at the result and decide if you are ready to publish the page or not.
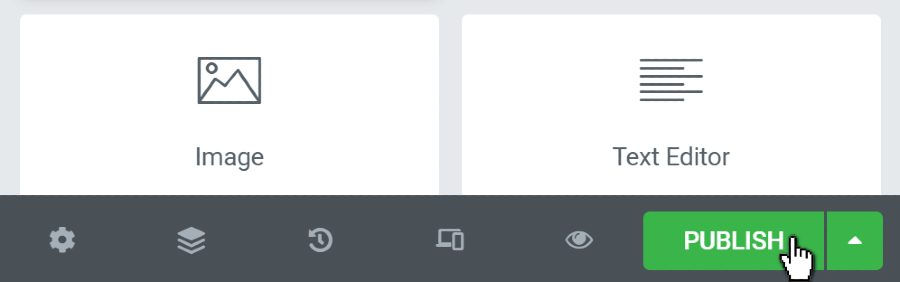
The final step in how to publish a page with Elementor is to click on the “Publish” button. Once this is done, you can select “Have a Look” to see what the published page looks like on the web. If you don’t like what it looks like, you can always change it.
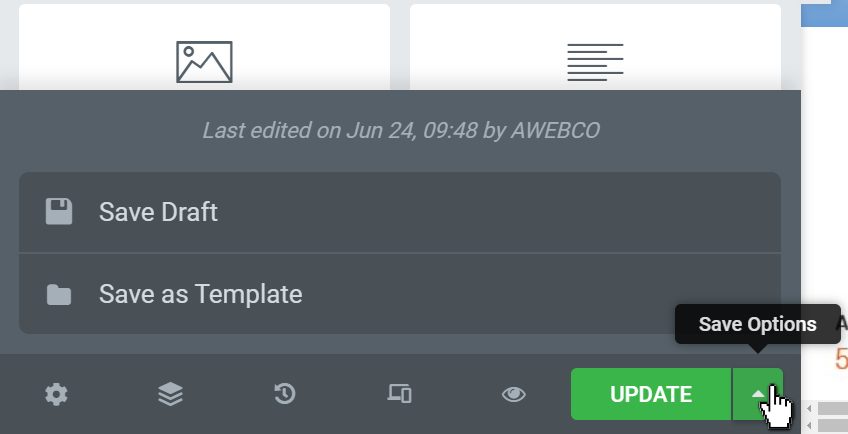
Instead of publishing your Elementor page content, you can save it for later. Whenever you edit a published or unpublished page, you can save your work as a draft. By doing this, you can avoid ruining a published page when you aren’t done with your work yet.
To save your page, select the arrow next to the “Update/ Publish” button. Then, choose to save your page as a draft.
Where to Hire an Elementor Expert
After guiding you through the process of editing your website with Elementor, we understand that sometimes you might want to hire an expert to take your website to the next level.
There are several platforms where you can find Elementor experts who can help you with your website. Here are some of the best options:
Awebco (awebco.com)
Reasons to consider Awebco:
- Expertise in Elementor: Being the host of the blog you’ve just read, we at Awebco have demonstrated expertise in using Elementor. We have a deep understanding of the tool and know how to maximize its features for your benefit.
- Tailored Services: We provide tailored services that are specifically designed for your website. This ensures that your website is unique and stands out from the crowd.
- Reliable Support: With us, you can expect reliable customer support. We will guide you through the process and provide assistance whenever needed.
At Awebco, we pride ourselves on our expertise in Elementor and web design. Our team is dedicated to ensuring that your website not only looks great but also performs exceptionally.
We understand the importance of a well-designed website in today’s digital age, and we are committed to helping you achieve your online goals. Our tailored services are designed to meet the specific needs of each client, and our customer support is always available to ensure a smooth and satisfying experience.
Fiverr (fiverr.com)

Reasons to consider Fiverr:
- Affordability: Fiverr is known for its affordability. You can find freelancers offering their services at various price points, including some very economical options.
- Variety of Talent: There is a wide range of freelancers available on Fiverr, allowing you to choose someone who fits your specific needs and preferences.
- Quick Turnaround: Many freelancers on Fiverr offer quick turnaround times, which can be beneficial if you are working on a tight schedule.
Fiverr is a global online marketplace where you can find a diverse range of services offered by freelancers. Whether you need a logo design, content writing, or an Elementor expert, Fiverr has it all.
One of the key advantages of using Fiverr is the ability to find services that fit your budget. The platform is user-friendly and allows you to communicate directly with freelancers, ensuring that your project is completed to your satisfaction.
TopTal / Top Talent (toptal.com)
Reasons to consider TopTal:
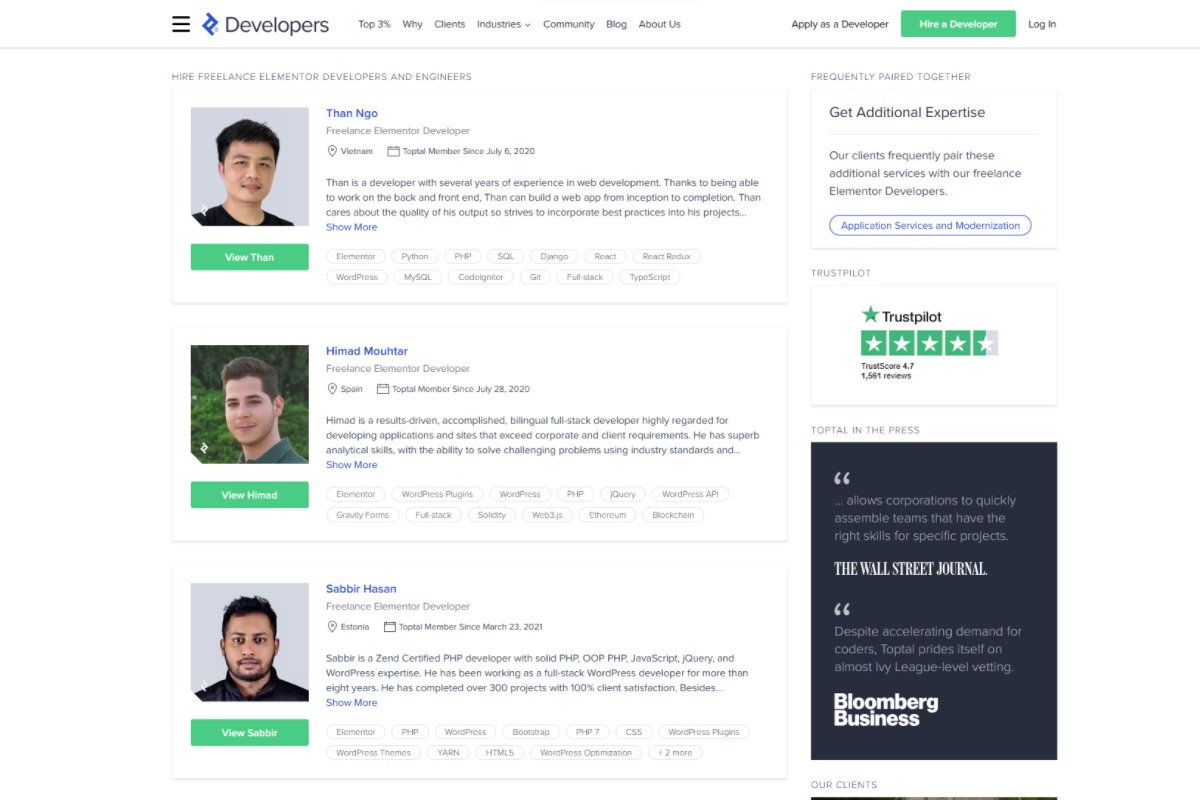
- Highly Skilled Professionals: TopTal is known for having a rigorous screening process, ensuring that only the top 3% of applicants are accepted. This means that you are likely to find highly skilled Elementor experts on TopTal.
- Dedicated Matching Process: TopTal has a dedicated team that matches you with freelancers based on your specific requirements, ensuring a good fit.
- Trial Period: TopTal offers a trial period, allowing you to work with the freelancer for a short time to determine if they are the right fit for your project before committing long-term.
TopTal stands for Top Talent, and true to its name, the platform is known for housing some of the most talented professionals in the industry. TopTal has a stringent screening process, ensuring that only highly skilled and experienced freelancers are part of their network.
This is particularly beneficial if you are looking for top-notch Elementor experts for complex projects. TopTal’s dedicated matching process and trial period make it easier to find the right fit for your project.
Upwork (upwork.com)
Reasons to consider Upwork:
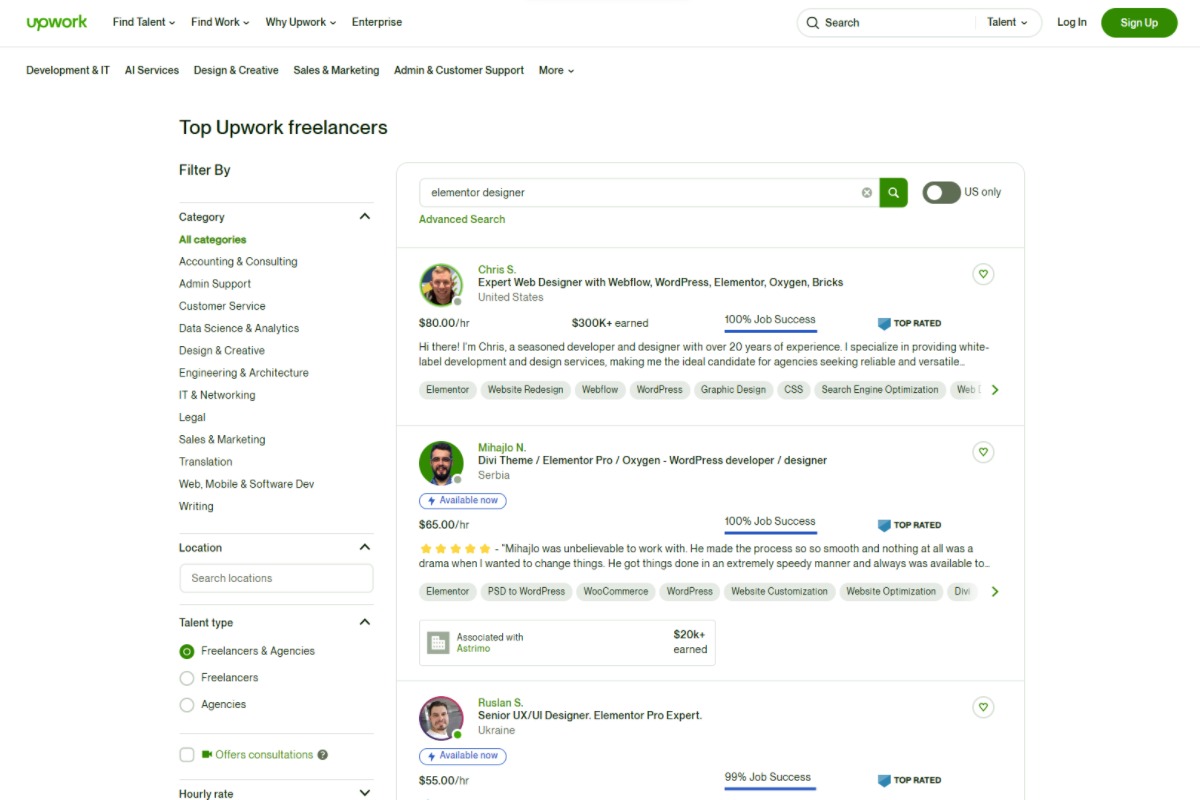
- Large Pool of Freelancers: Upwork has a large pool of freelancers, giving you a wide range of options to choose from.
- Flexible Hiring Options: You can choose to hire freelancers on an hourly basis, or for a fixed price, giving you flexibility in how you work with them.
- Secure Payments: Upwork offers a secure payment system, ensuring that payments are released only when you are satisfied with the work.
Upwork is one of the largest global freelancing platforms where businesses and independent professionals connect and collaborate remotely. With a vast array of freelancers specializing in different fields, including Elementor experts, Upwork provides a versatile platform for all your website needs.
The platform’s escrow system ensures secure payments, and the availability of both hourly and fixed-price contracts gives you the flexibility to choose the best engagement model for your project.
Freelancer (freelancer.com)
Reasons to consider Freelancer:
- Competitive Bidding: On Freelancer, you can post your project and receive bids from freelancers. This allows you to choose the most competitive offer.
- Milestone Payments: You can set up milestone payments to ensure that you are satisfied with the work at each stage before releasing payment.
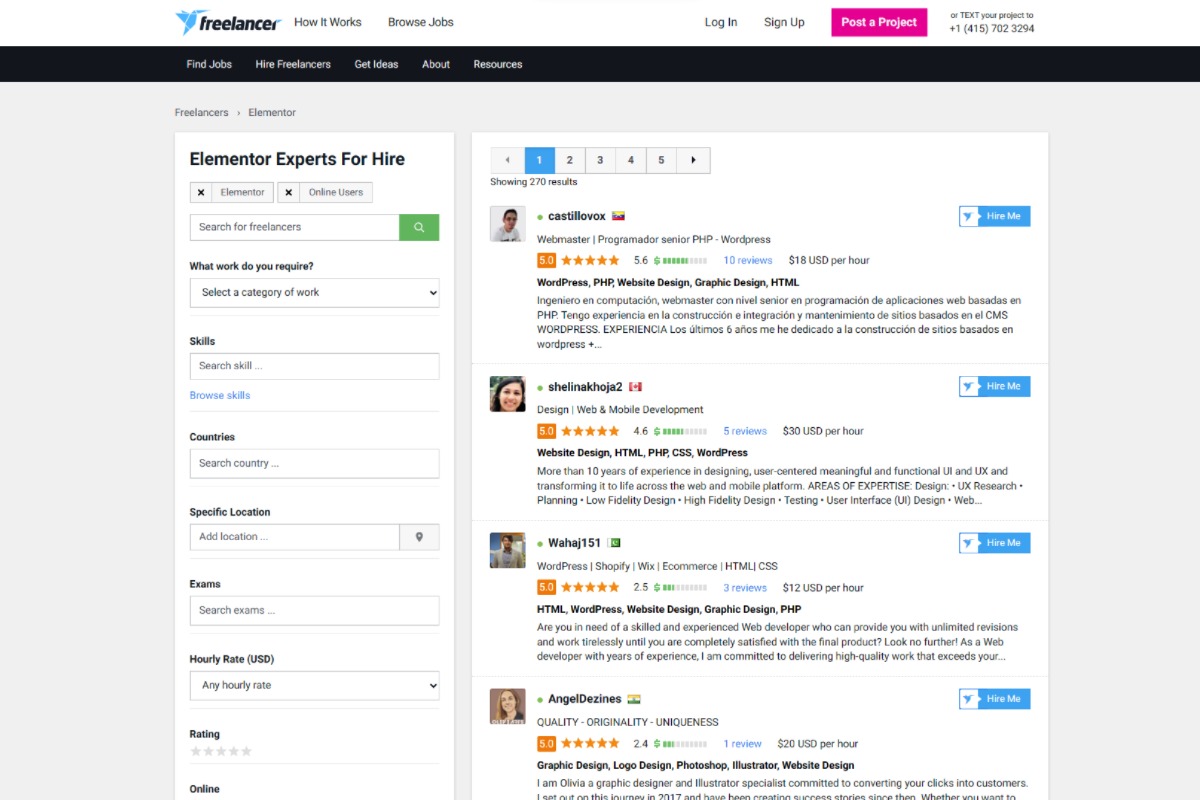
- Freelancer Ratings and Reviews: Freelancer has a rating and review system that allows you to see feedback from other clients, helping you make an informed decision.
Freelancer.com is a marketplace where employers can post projects and freelancers can bid on them. This competitive bidding environment allows you to find services at the best prices.
Freelancer.com is particularly known for its milestone payment system, which allows you to release payments only when certain milestones are achieved, ensuring that you are satisfied with the progress of the work. The platform also features a rating and review system, which can be invaluable in selecting a freelancer with a proven track record.
Handle Elementor Updates on Your Own or Work with Professionals
Now that you know how to edit your website with Elementor on your own, you should be able to make updates and customizations without completely screwing up your website!
While it takes a little time to get used to using the Elementor text editor, blocks, other widgets, and settings, learning to edit with Elementor is fairly easy. By using Elementor, you can quickly change your website whenever you want without having to learn a single line of coding.
Whether you edit with Elementor yourself or are looking for professional assistance, a dependable web design company like AWEBCO can make it easier! Reach out to our team if you’d like help with Elementor updates or other web design efforts!